
Your source for TiVos in Australia
![]()
![]()
![]()
![]()
![]()
![]()
Guided Setup, Australian Style!
Don't try to run Guided Setup (GS) on a Hobotech TiVo sold after 26 January 2006 by following the ozTiVo instructions, you'll find it very confusing if you do! Our TiVos have a unique highly customised Setup especially tailored for the way we do things here, which we think is a lot easier to use.
You don't really need a howto to do a GS on one of our TiVos, but there are one or two screens which could use a little clarification due to limited screen space on the TiVo so we've done one anyway! We've tried to make it pretty exhaustive, hopefully it should answer any question you're likely to have, but unfortunately this has also made it pretty long! Don't worry, you don't have to read it all if you don't want to, just refer to it if you find the need!
Preparing for Guided Setup
Before you can do Guided Setup you need to put your TiVo in the appropriate mode, which you do via TiVoWeb. Type your TiVo's IP address (look in TiVo Messages for a message titled "IP Addresses" if you don't know the address) and TiVoWeb will open up in your browser.
Select "PAL NTSC", then click on "Set PAL Guided Setup Mode". You will be told to reboot the TiVo, do so by unplugging and replugging it.
When your TiVo reboots it will either take you directly into Guided Setup mode, in which case you can skip the next paragraph, but if it boots to TiVo Central then you'll need to invoke Guided Setup manually.
To enter GS manually, after setting the mode via TiVoWeb, go to TiVo Central, select Messages & Setup and then select "System Reset" then "Repeat Guided Setup". You will be asked to press "Thumbs Down" three times, then "Enter", so please do so! You should then enter Guided Setup.
Performing Guided Setup
During this "walkthrough" of the GS process we will discuss the entire process of setting up a TiVo to work in Canberra, using the TiVo's PAL tuner and a Foxtel Analog Satellite TV Box. Your setup may be different, but you should have no trouble adapting these instructions to your particular configuration.
A lot of screens just require you to read them, then press "select" and we'll skim over them pretty quickly, the first two you'll see fit into that category, so let's get going...
The "Welcome" Screen
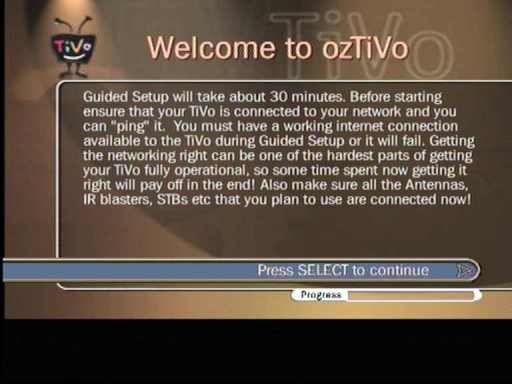
You don't have to do anything on the welcome screen, just read it and then press select!
The "Service Terms" Screen
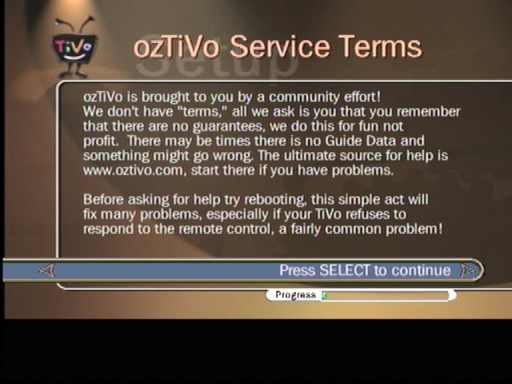
Another one you just need to read, then press select to continue. Please note however that if you have purchased a Hobotech TiVo you should contact us first with any problems, we're sure to be able to help out!
The "Sources" Screen
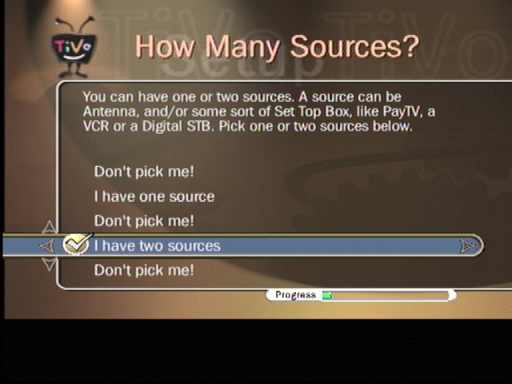
Wow! At last a screen you can actually interact with! It's pretty easy though, a "source" is something plugged into your TiVo, like an antenna cable (requires PAL Tuner) or some sort of set top box. Pick "I have one source" if you have one "signal carrying" cable plugged into the back of the TiVo, or pick "I have two sources" if you have two such cables connected. Then press Select to move on! (See, it's not that hard, and It doesn't get a lot harder than this!)
This should be so obvious that I shouldn't need to say it, but NEVER pick an option on any of these screens that says "Don't pick me!" or words to that effect!
The "Postcode" Screen
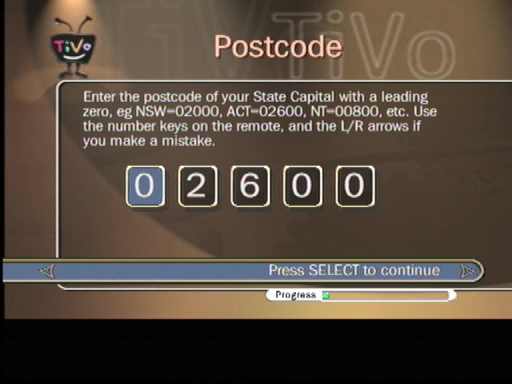
On this screen you enter the Postcode of your State's capital, with a leading zero, as shown in the above example for the ACT. Use a postcode from the following list, don't use your real postcode unless it happens to be on the list! You can use the thumbpad on the remote to move left or right and to increase or decrease the numbers, try it, you'll soon get the hang of it!
| State | Value to enter |
| ACT | 02600 |
| NSW | 02000 |
| VIC | 03000 |
| QLD | 04000 |
| SA | 05000 |
| WA | 06000 |
| TAS | 07000 |
| NT | 00800 |
The "Time Zone" Screen

Time Zones have no meaning on an ozTiVo but unfortunately we can't kill the screen so you just need to pick the obvious choice at the top of the screen and move along!
The "Daylight Savings" Screen
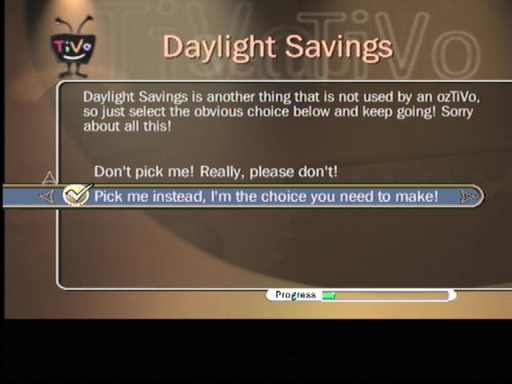
ozTiVos have their own way of dealing with Daylight Savings Time, and it works! So don't monkey about here, if you can't work out which choice you should make on the screen above we're not sure you're quite ready for a TiVo! Maybe you should stick with a VCR!
The "Area Code" Screen
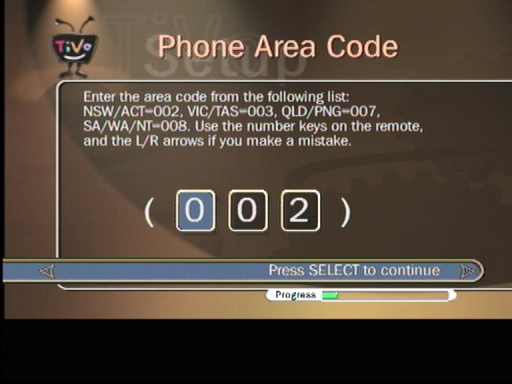
This screen is a bit like the postcode one we did a minute or two ago, you DON'T put in your actual Area code, you pick one from the following list according to the State in which you live. Although the screen says to use the number keys, you can use the thumbpad too, just like the Postcode screen.
| State | Area code to use |
| ACT/NSW | 002 |
| VIC/TAS | 003 |
| QLD | 007 |
| SA/WA/NT | 008 |
The "Phone Dialing Options" Screen
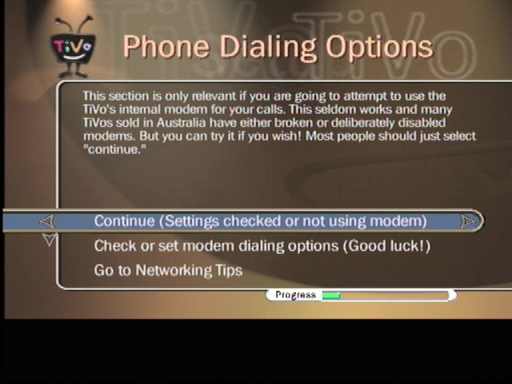
Now, we really hope you're not going to try to use the TiVo's internal modem, if you bought your TiVo from Hobotech it won't work, ours are disabled to comply with Australian regulations! And even if you bought somewhere else it probably won't work either, half the ones sold on US eBay have modems which are broken. Not just that but many ISPs don't support the necessary protocols. If you try it you're on our own! But if you've got a network card just select continue and move on! You can also access a page of networking tips from here, if you need to.
The "First Setup Call" Screen
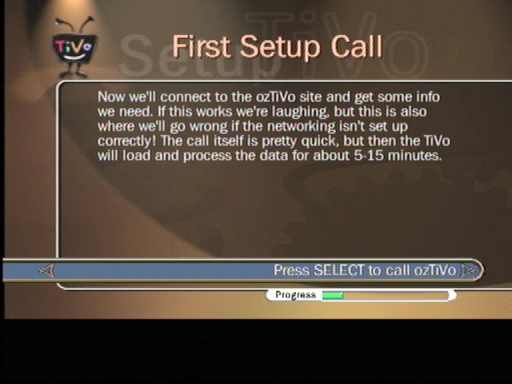
This just a screen that warns you what is about to happen, just press Select and move along!
The "First Setup Call" Progress Screen
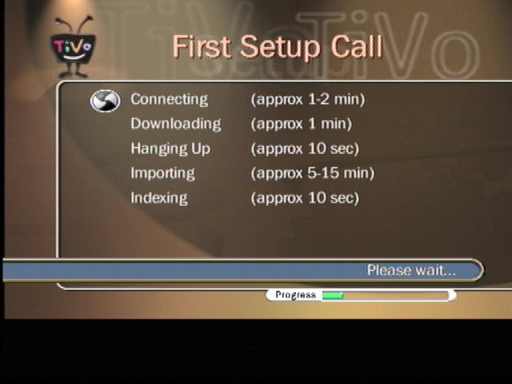
This is it! This is where where we find out if the networking is all working right! Once it moves to "Downloading" you're probably going to be okay! But if the call fails you're going to have to fix it before you go any further. We have created a little bit of on-line help on the TiVo itself, go back to the Phone Dialing Options screen and select "Go to Networking Tips" and see if anything suggested there helps! But networking is a big topic, we couldn't begin to cover all the possibilities in the space available!
For a full discussion of networking and how to solve problems we recommend you visit the OzTiVo networking Page where you will find a mile of help.
However, let's assume it worked and all the items now have a tick against them, it's time to press select and move along!
The "Dial-In Number" Screen
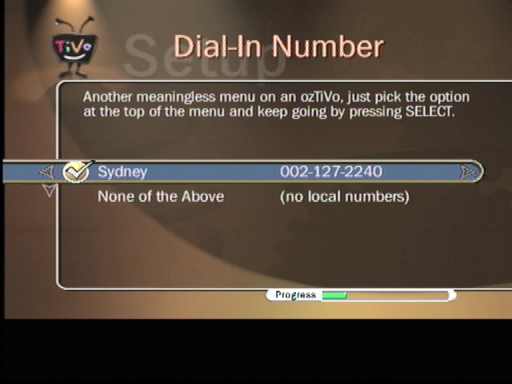
Yet another screen we don't care about, select the top option and keep going!
The "Dialing Format" Screen
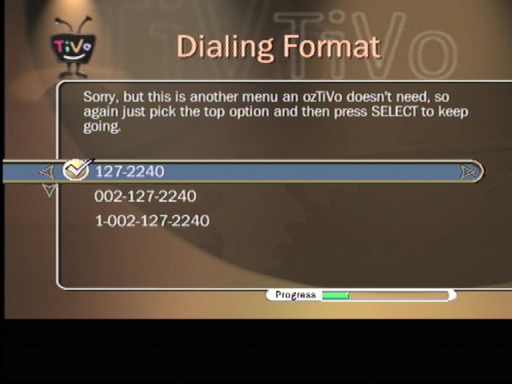
Guess what? We don't care about this one either, pick the top option so we can move on to something interesting!
Now things might vary a bit depending on whether you indicated you were using one source or two sources right at the beginning of GS. Remember, we said we were going to configure the TiVo for 2 sources, Analog Free To Air via a PAL tuner, and Foxtel Analog via Satellite. If your configuration is different you may not see all the following screens, or they may not be in the same sequence. For example, if you're only doing a single source you won't see the "second input" screen, there's no way we could cover every scenario in this howto, it's too big already! But don't worry, it won't be all that different, we're sure you'll figure it out!
The "Set your SECOND input" screen
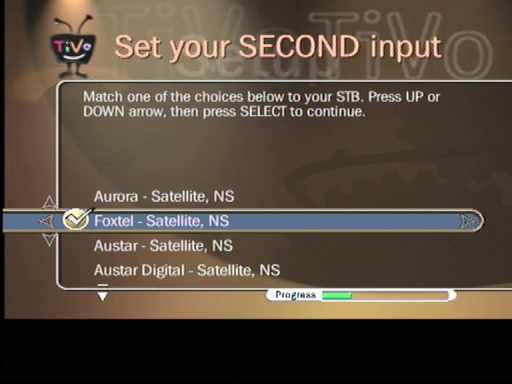
Your second source is always going to be a Set Top Box of some kind, NEVER antenna! Because the US only uses 2 letters for their State abbreviations we have to put up with truncated state abbreviations which is why you see the NS (for NSW) in the above shot. Scroll through the list and pick the the box description that matches your box. As you can see, we've selected Foxtel Satellite above (which is Analog, if it was digital it would say so, the absence of a descriptor implies analog)
The "Set your First input" screen
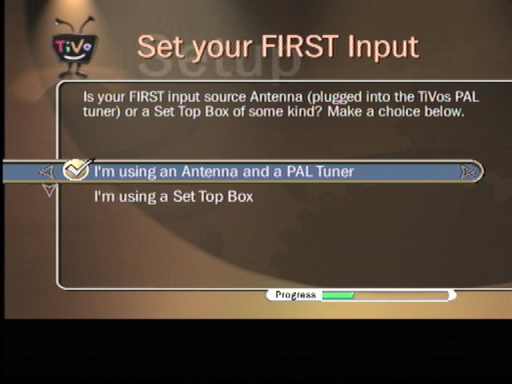
Okay, this screen is pretty simple, if your first or only input is the PAL tuner (as it is in our case) select the top option, but if it is some sort of box select the lower option. When you've highlighted an appropriate choice press select to move on!
The "First Input Lineup" screen
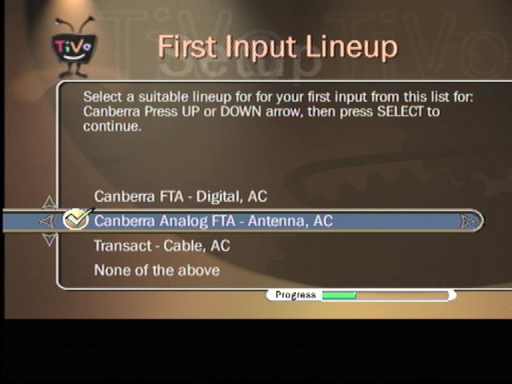
The same principle applies here as before, pick the lineup that suits whatever your first input was, in our case here our first input was antenna, so we've selected that an appropriate lineup for that!
The "Finalise First Lineup" Screen
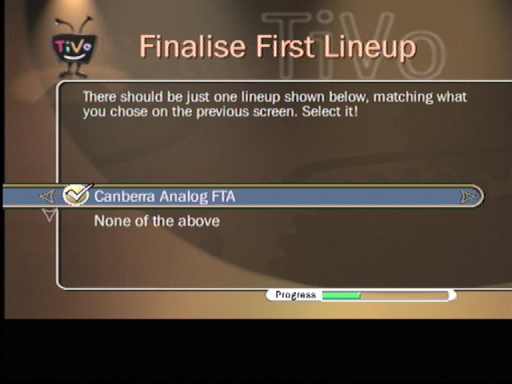
As the screen says, just select the top option and continue!
The "Channels You Receive" screen
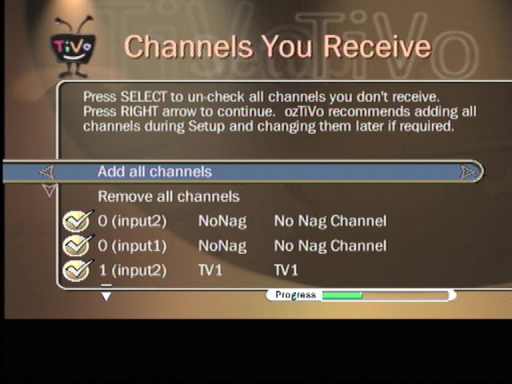
On this screen we want to select "Add all channels." Later on, after we've finished Guided Setup you'll have plenty of time to customise and remove unnecessary channels, but for now let's concentrate on the job at hand. Note this is a slightly unusual screen, you don't press SELECT to move ahead, you use the Right Arrow instead. So do it!
The "Connections to Recorder" screen
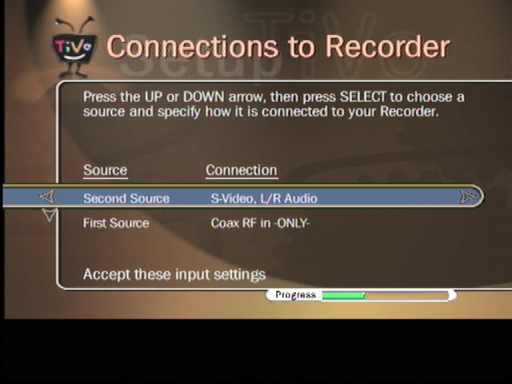
Now were getting to the nitty-gritty! In our setup we've got two sources, one of which is Antenna (ie, the Coax RF in) and the Foxtel Box. There's nothing that needs to be set for the first (antenna) source, but we need to tell TiVo if the Foxtel Box is connected to the TiVo with S-Video or or Composite (RCA) cables. So press the right arrow to move to the next screen where we can select which connection we wish to use, and test that it works.
The "Connection to Recorder" screen
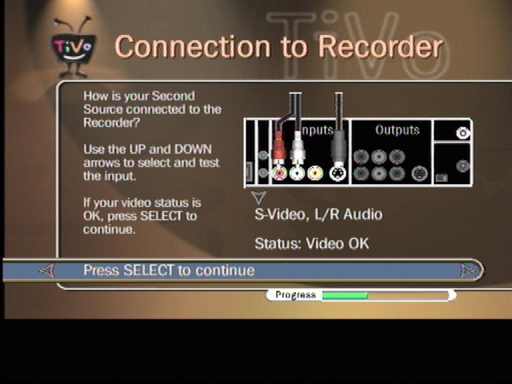
This Screen is rather nice, you use the Up/Down arrows on the remote to move between the S-Video and composite connectors, move to the connector you want to use (which should have the box connected and the box should be switched on) and the TiVo will check for a valid signal on the connector. If it finds a good signal it will show "Status: Video OK" as shown above. If you don't see "Video OK" check the connector and the box and try again. It might be an idea to plug the STB direct to your TV just to make sure it really is putting out a picture! When you've got it right press select to return to the previous screen and select "Accept these input settings".
The "Control Cable/Sat. Setup" Screen

On this first screen which assists in setting up how TiVo controls an STB. There are two ways a TiVo can control an STB, Serial or Infra Red, we are not aware of any device in Australia which can be controlled by Serial, so make sure you select IR at each stage of this process unless you're totally sure it should be serial, in which case you're on your own, as we've never seen such a box! Press the Right Arrow to move to the next screen in the IR setup process.
The "SetTopBox IR Control" screen

On this screen just select Infrared unless you're totally sure it should be something else!
The "SetTopBox Brand" screen
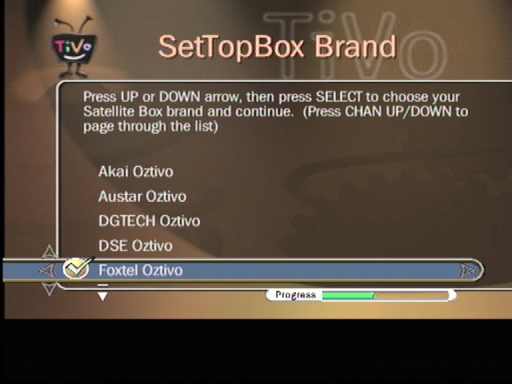
On this screen you select the variety of STB you want to control. Do so, then press select to move to the next screen.
The "SetTopBox Enter Key" Screen
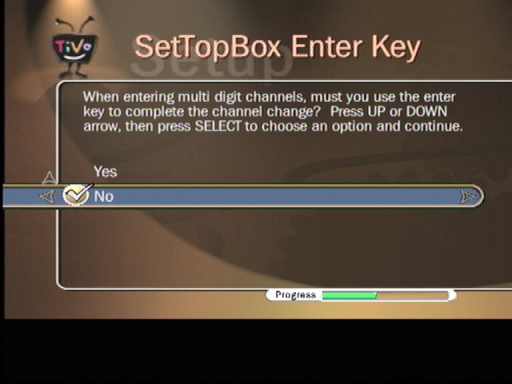
All STBs we've ever used have not needed you to press an "enter" key to change channels, so unless you're sure yours does require it select no, then move on.
The "Infrared Test Checklist" screen
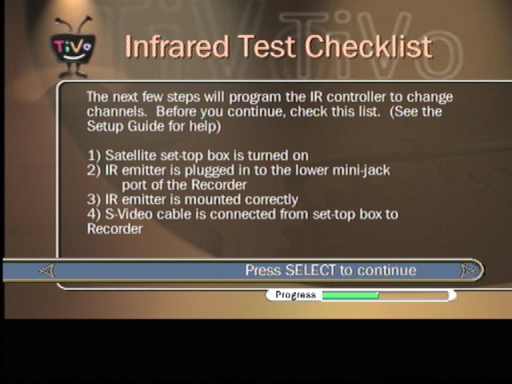
Double check that you've got everything connected the move to the next screen.
The "IR Test Instructions" screen
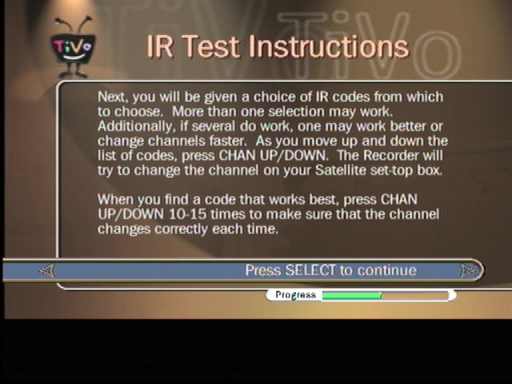
Read the instructions carefully, then press select, and don't worry, we're nearly finished!
The "Screen without a title" Screen!
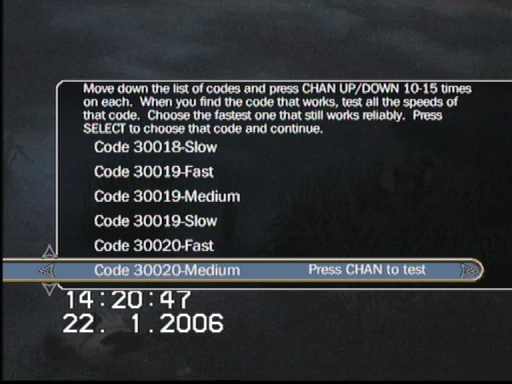
On this screen you actually get to test whether any set of codes will successfully control your box! Start at the top and work down the list until you find a set that controls your box consistently and reliably! You should see the STB's channel number display change (if it has one) and the TV image should change to the new channel when you've got it right. It might take a little while until you find the the right set, but once it's been done you won't have to do it again! When you've got a set that works well just press select to move back to the previous screen, and then select "Accept these input settings.
The "Guide Data Call" screen

This one's easy! Press Select to start the call, which should work without any trouble since we've already called in once. So, we won't bother showing the progress screens, which are just like the ones you saw during the first call. Just keep going until you see the screen shown below.
The "Before You Can Record" screen

Usually it doesn't take as long as the 4-8 hours before recording is enabled. An hour or two is probably more realistic. But it might! Sometimes it seems to take longer than others, depending on how much Guide Data is available on ozTiVo and how complex your channel line-up is. For now just press Select to continue.
The "Remote Usage" screen
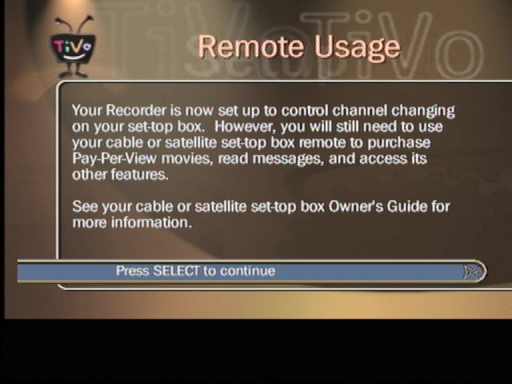
Just read it and continue!
The "Congratulations" screen
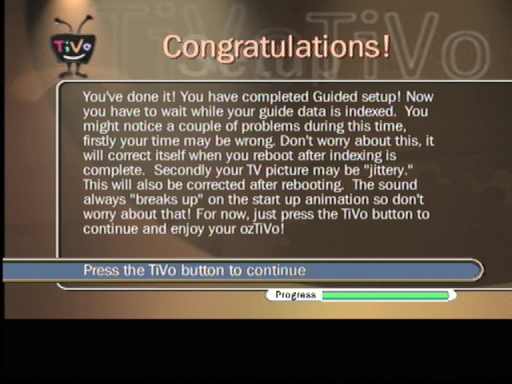
Well, you really do deserve congratulations! If you see the screen above you've done it, and your TiVo is nearly ready for full use! Now all you have to do is heed the warnings above and wait until Guide Data Indexing is complete. (You'll know when that is done because going into "Pick Program to Record" in TiVo Central will stop warning you that indexing is underway). When that's all done re-boot the TiVo and everything should be ready to rock! Note that if the TiVo shows the ozTiVo splash screen with "Maintenance Mode" displayed when you reboot it just reboot a couple of times more until it no longer says that!
Now enjoy your TiVo! If you have any problems with it contact us at Hobotech.com and we'll do all we can to resolve them. We've probably seen just about every problem that a TiVo can have and we won't rest until we've got you going!
Have fun! (We know you will!)
![]()
© Hobotech Pty Ltd 2005,2006